How to import Spring Boot project in Eclipse/STS IDE
On this page you’ll find step by step guide to import a existing Spring Boot project in your Eclipse/STS IDE. Eclipse is very popular and handy tool (IDE) to develop a Spring Boot, Java, Web Project, etc. and familiar with every Java Developer.
Let’s begin from creating or cloning a Spring Boot project.
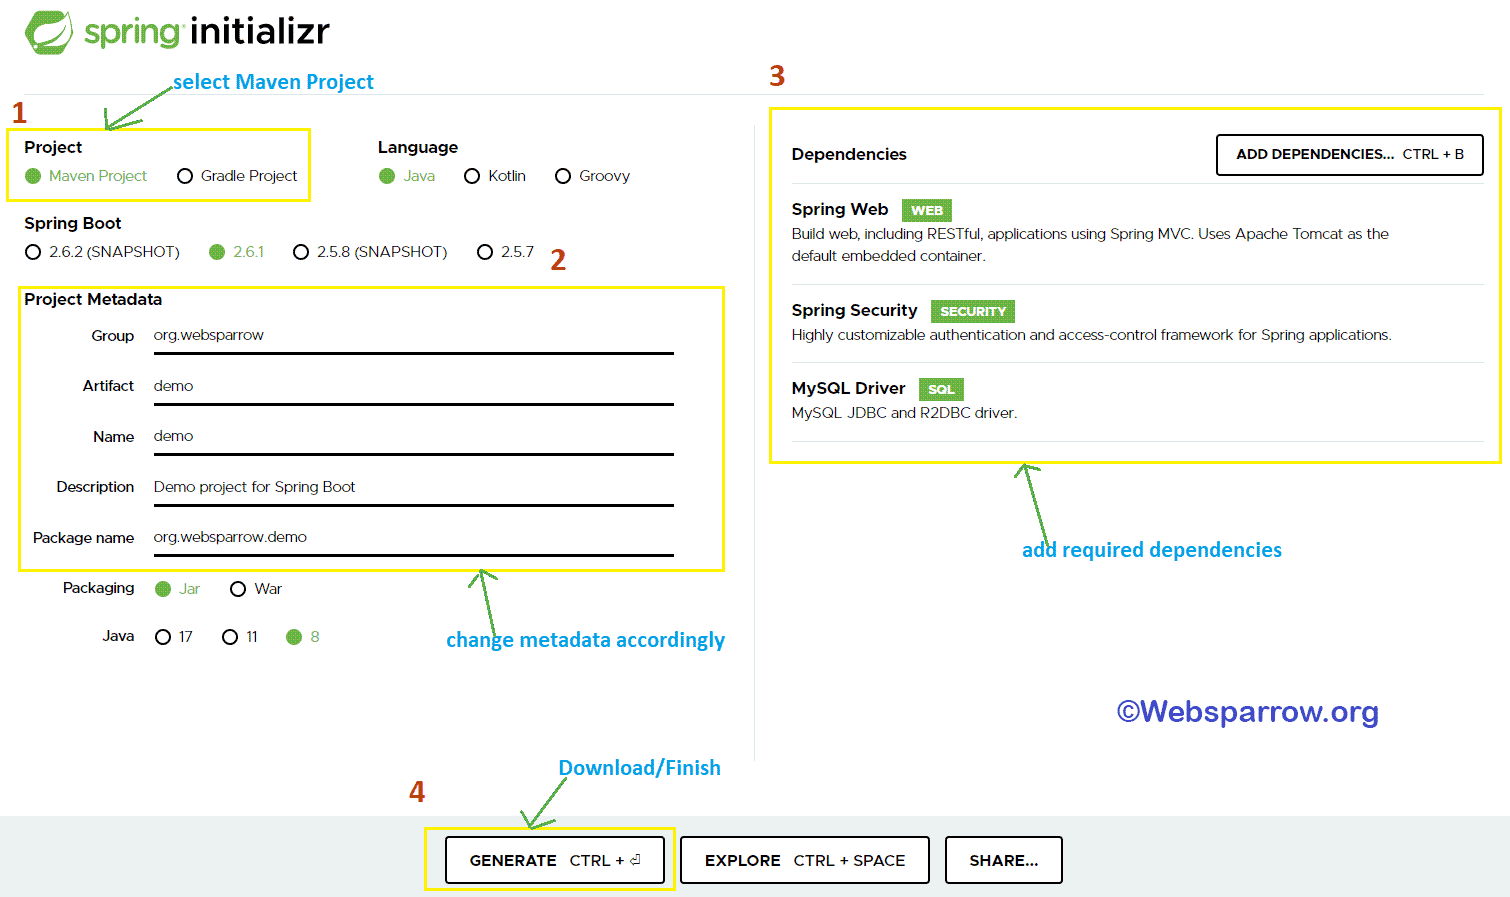
Step 1: Create or clone a Spring Boot project. In my case, we have created a Spring Boot project from Spring Initializr and downloaded the project in the my computer by clicking on the button or press Ctrl + Enter button from your keyboard.
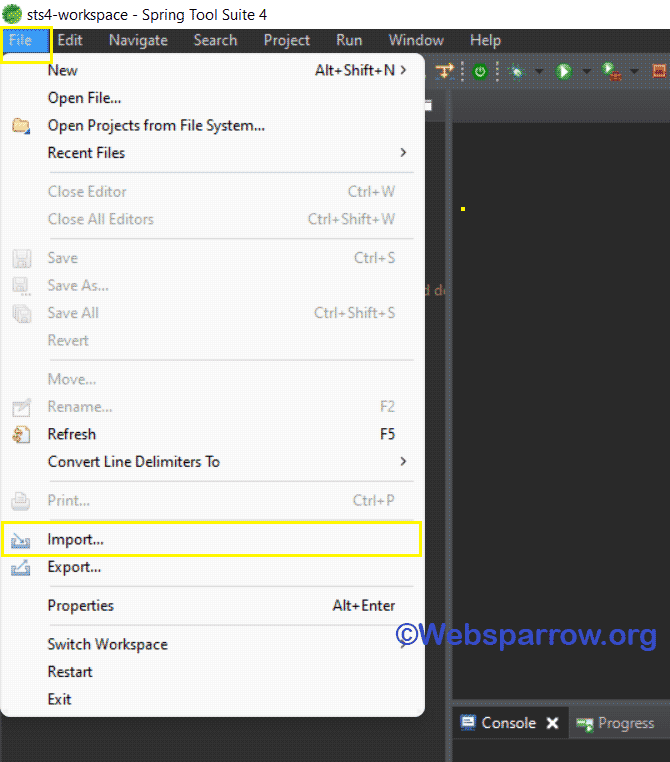
Step 2: Unzip the downloaded the project and open the Eclipse/STS and go to the File » Import.
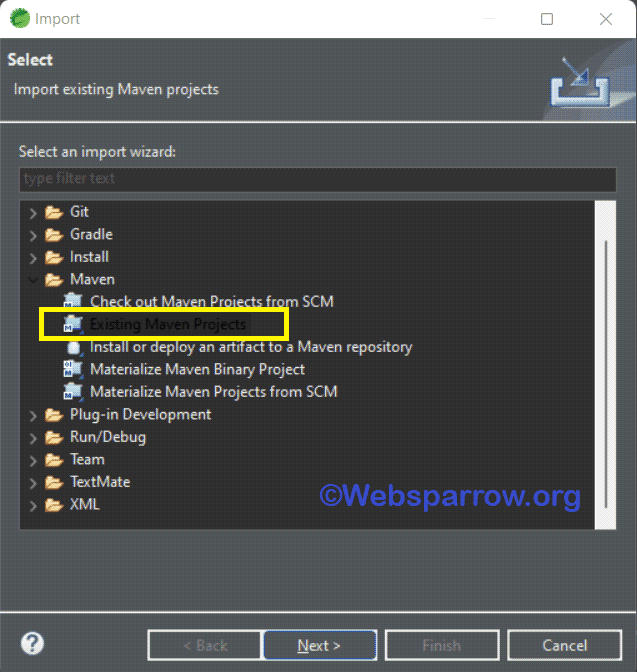
Step 3: Search for Maven, expand the folder and go to Maven » Existing Maven Project » Next.
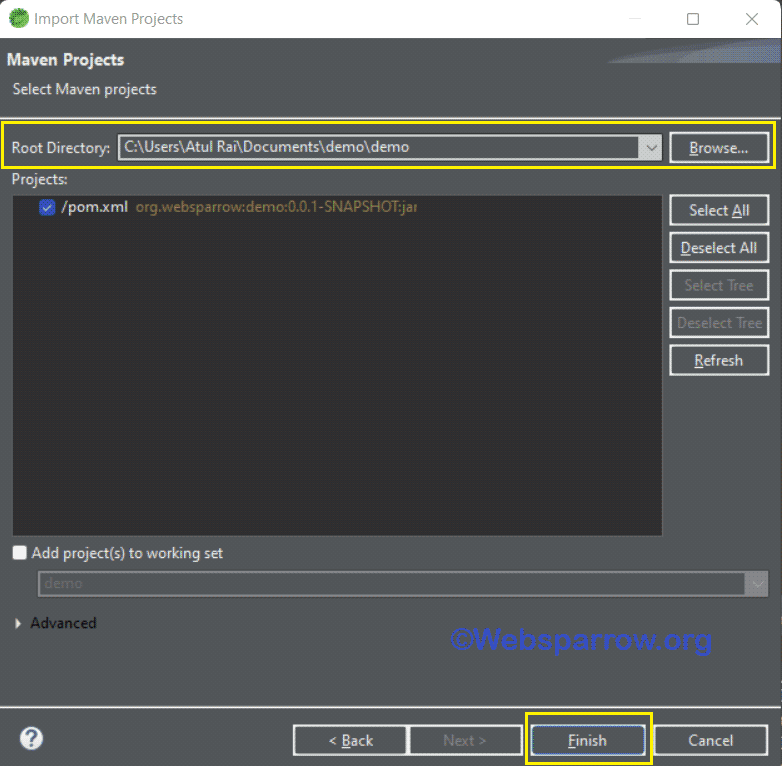
Step 4: Browse your computer directory where you have unzipped the downloaded Spring Boot project. It will scan for pom.xml. Select your project pom.xml and click on Finish button.
Step 5: That’s all.
References
- How to import Maven project in Eclipse
- How to import Gradle project in Eclipse/STS
- How to import Java Web Project in Eclipse