How to deploy jasper reports in JasperReports Server
In this tutorial, we are going to show how to add and run the report (.jrxml file) in JasperReports Server. You can easily publish your reports to any JasperReports Server connection. Publishing to the server uploads the JRXML for the report, along with any resources that the report needs such as images and query resources.
Follow the below steps to add a report in JasperReports Server.
In this example we have added a simple report, no parameter is used in report.
Step 1: Design your report and compile it and make sure there is no compilation error in the report. To design the report you may use iReports.
Step 2: Login to JasperReports Server with your user id and password. Make sure you have permission to read, write, and execute the report. For better learning login with admin credentials.
Step 3: Click on the View » Repository and expand the Organization folder, select Reports folder.
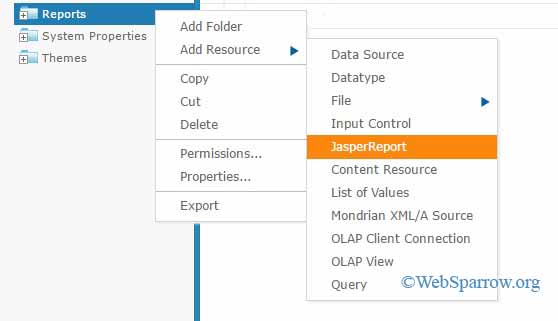
Step 4: Right-click on the Reports folder and go to Add Resource » JasperReports .
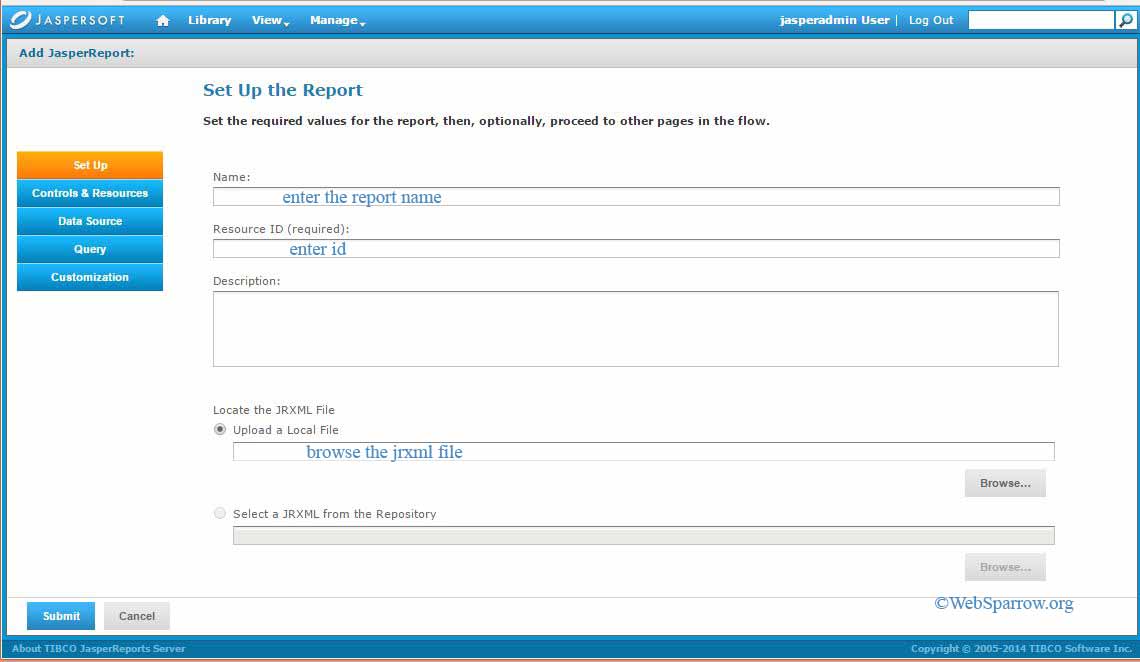
Step 5: A new page will open, fill the required details and browse the report (.jrxml file).
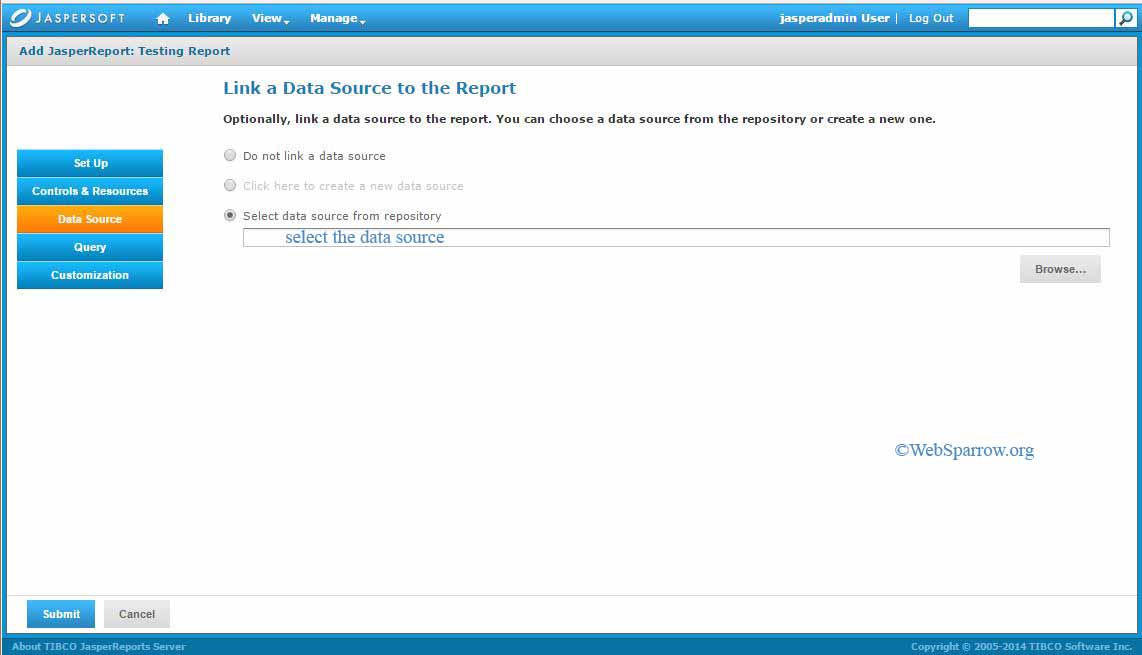
Step 6: After filling the above form, click on the Data Source tab » Select data source from repository » Browse.
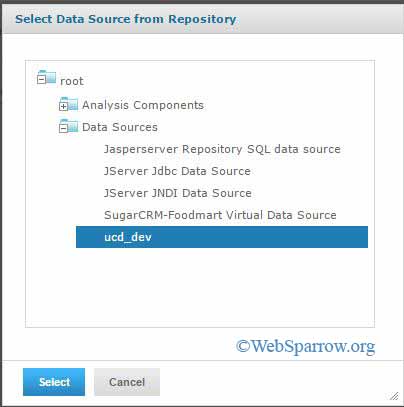
Step 7: Select the data source and click on Select button.
Data Source provide the connection between JasperReport Server and Database. Check this to create a data source Create a Data Source in JasperReports Server
Step 8: Now you are almost done. Hit the Submit button.
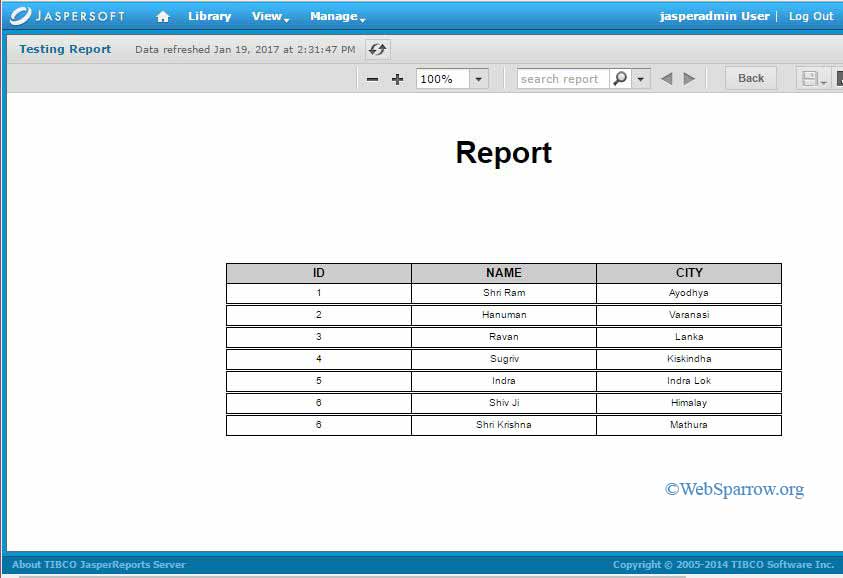
Step 9: Finally your report successfully added in JasperReports Server. To check it whether it is working or not, go to that folder where you have added the report. Find your report name and run the report.
Step 10: Here my output.
Step 11: Done. Thank You 🙂