How to install Apache 2.4 and PHP 8 on a Windows Machine
In this tutorial, you will learn how to install and configure Apache 2.4 and PHP 8 on a Windows machine. We all know Apache HTTP Server is an open-source cross-platform and free webserver to run web applications and similarly PHP is a free and open-source scripting language used to develop web applications.
To run the PHP code on a Windows machine, first, you’ll need to install and configure a web server (Apache) that executes the PHP application. And on this page, you will find the step-by-step guide on “How to install Apache 2.4 and PHP 8 on a Windows Machine”.
P.S. Tested with Apache 2.4 and PHP 8.1.4 on a Windows 10 machine.
1. Prerequisites
Download the Apache 2.4.x and PHP 8 from its official websites, extract the downloaded file and move it to the C drive.
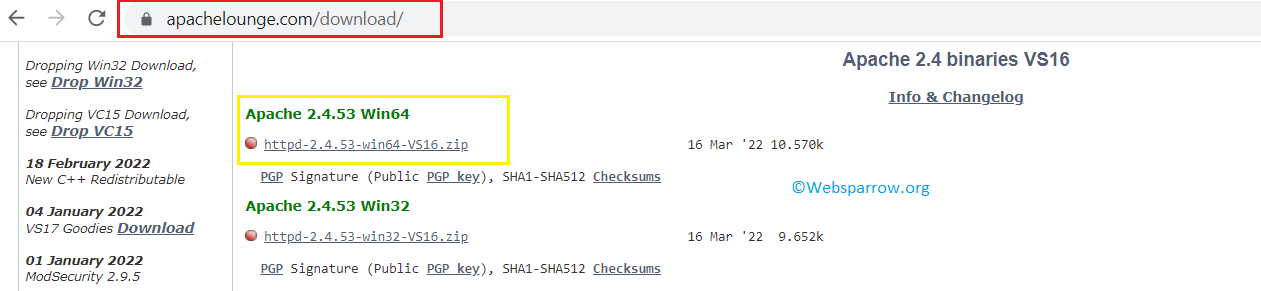
1.1 Download Apache 2.4.x – Depending on your system build download the binary zip file accordingly.
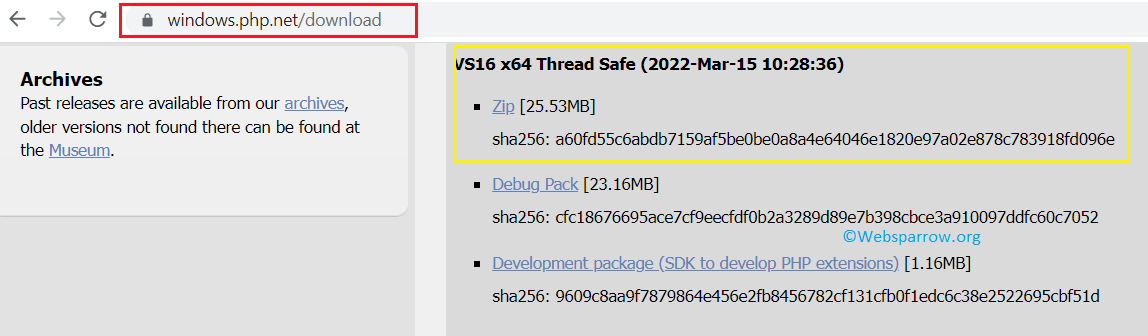
1.2 Download PHP 8 – Similarly, depending on your system build download the Thread Safe version of PHP.
Before jumping to the main configuration part, be sure you installed latest 14.31.31103.0 Visual C++ Redistributable Visual Studio 2015-2022 : vc_redist_x64 or vc_redist_x86 software.
2. Install Apache
To install the Apache HTTP Server on a local Windows machine move the downloaded and extracted Apache 2.4 binary files to the C drive and follow the below steps:
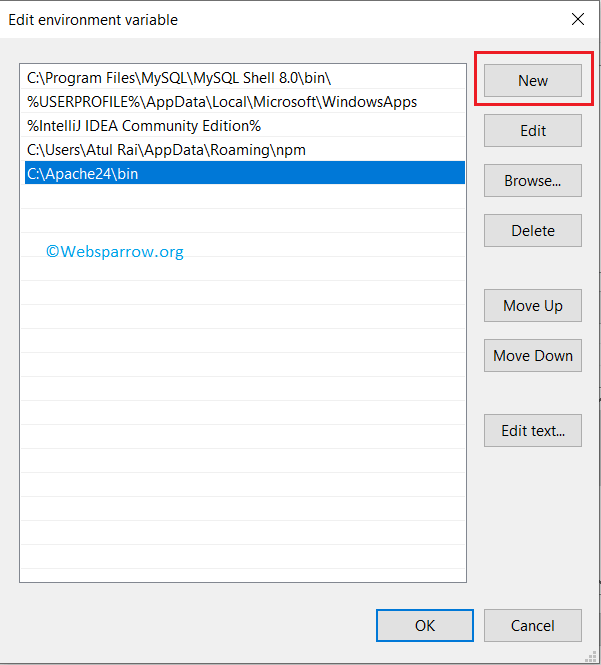
Step 2.1: Go to the Apache 2.4 bin directory path C:\Apache24\bin (it might be different in your case) and set it into your system environment variable path.
Step 2.2: Open the command prompt with admin privileges and run the httpd -k install command to install the Apache services.
C:\WINDOWS\system32>httpd -k install
Installing the 'Apache2.4' service
The 'Apache2.4' service is successfully installed.
Testing httpd.conf....
Errors reported here must be corrected before the service can be started.
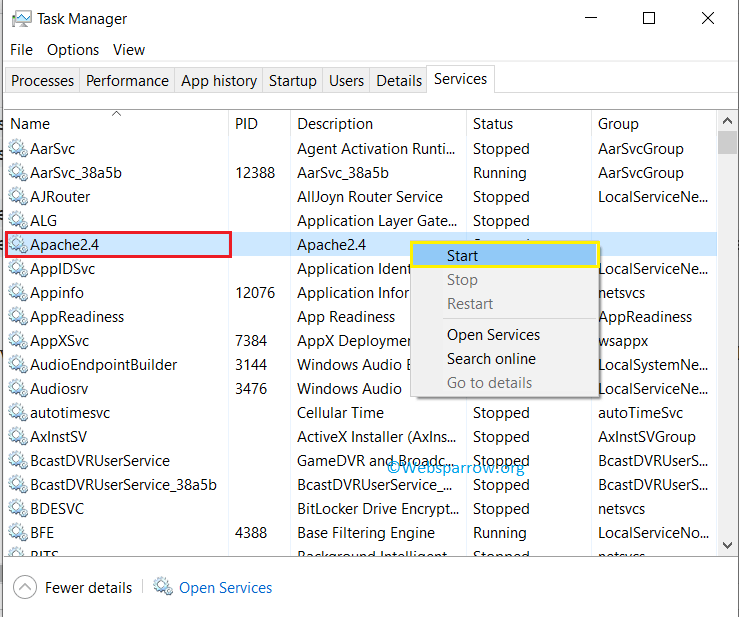
AH00558: httpd: Could not reliably determine the server's fully qualified domain name, using fe80::ccb2:109d:6198:a489. Set the 'ServerName' directive globally to suppress this messageStep 2.3: Start the Apache service with the command httpd -k start or directly through the Task Manager » Services » Search for Apache2.4 » Right-click on the service » Start.
By default, Apache HTTP Server runs on port 80, make sure no other services/servers running on this port.
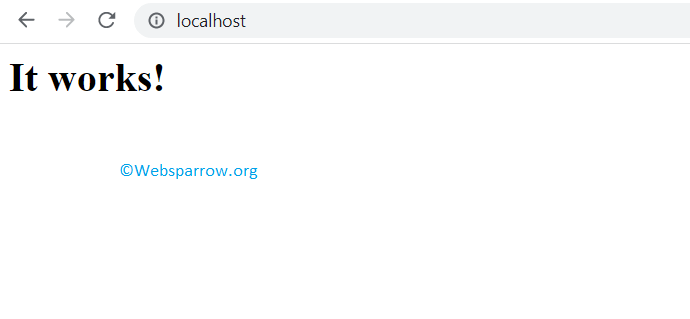
Step 2.4: Open the web browser and hit the default Apache localhost URL i.e localhost or localhost:80. If everything is configured correctly, you will see the default index.html web page contents and it is located inside the C:\Apache24\htdocs directory.
3. Install PHP 8
The next step is to install PHP 8. To do that, similarly, move the downloaded and extracted PHP 8 binary files to the C drive and follow the below steps:
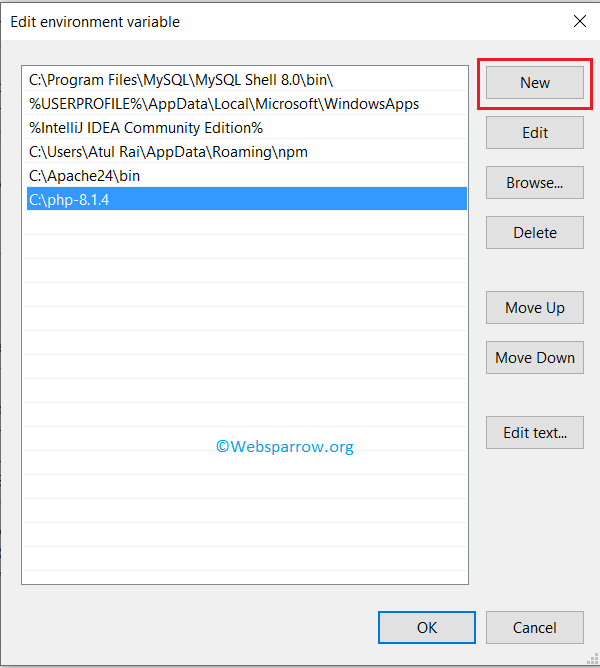
Step 3.1: Copy the PHP 8 home path i.e C:\php-8.1.4 and set it into your machine environment variable.
Step 3.2: Open the command prompt and type php -v to check whether the path is set correctly or not. If the PHP path is set correctly, it will print the PHP version.
C:\WINDOWS\system32>php -v
PHP 8.1.4 (cli) (built: Mar 16 2022 09:33:31) (ZTS Visual C++ 2019 x64)
Copyright (c) The PHP Group
Zend Engine v4.1.4, Copyright (c) Zend Technologies
4. Configure Apache and PHP
Now it’s time to configure Apache HTTP Server with PHP 8.
Step 4.1: Go to the C:\Apache24\conf directory, inside the conf directory edit the httpd.conf file. Go to the end of the file and add the below configuration because, in Apache, PHP is loaded as a module.
# Note: Repalce php_module location with your PHP path and
# if the php8apache2_4.dll is not available,
# download the non thread safe version of PHP.
LoadModule php_module "C:\php-8.1.4\php8apache2_4.dll"
AddHandler application/x-httpd-php .php
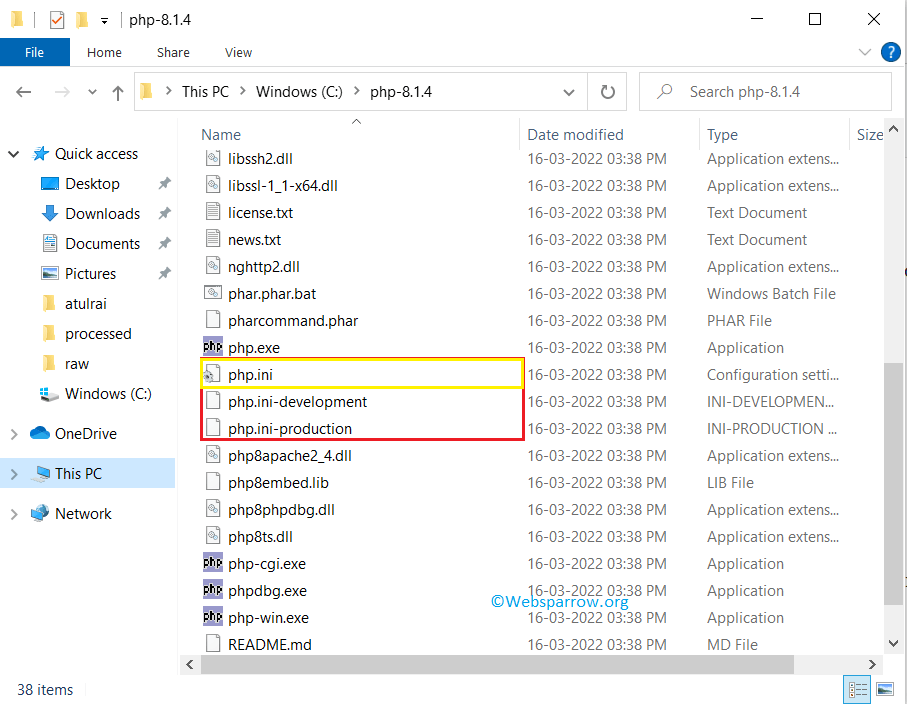
PHPIniDir "C:\php-8.1.4"Step 4.2: Go to the PHP home directory C:\php-8.1.4, and you will find two configuration files php.ini-development and php.ini-production. Create a copy of php.ini-development and rename it to php.ini
Step 4.3: Again open the httpd.conf file and search for ServerName, uncomment and edit the ServerName with localhost.
# ServerName gives the name and port that the server uses to identify itself.
# This can often be determined automatically, but we recommend you specify
# it explicitly to prevent problems during startup.
#
# If your host doesn't have a registered DNS name, enter its IP address here.
#
ServerName localhost
And in the same file also search for DirectoryIndex, and append the default index.php file.
# DirectoryIndex: sets the file that Apache will serve if a directory
# is requested.
#
<IfModule dir_module>
    DirectoryIndex index.html index.php
</IfModule>
Step 4.4: Open the command prompt and run the httpd -t command to validate whether everything is configured correctly, it will return Syntax OK if everything is configured correctly.
C:\WINDOWS\system32>httpd -t
Syntax OK
5. Test the configuration
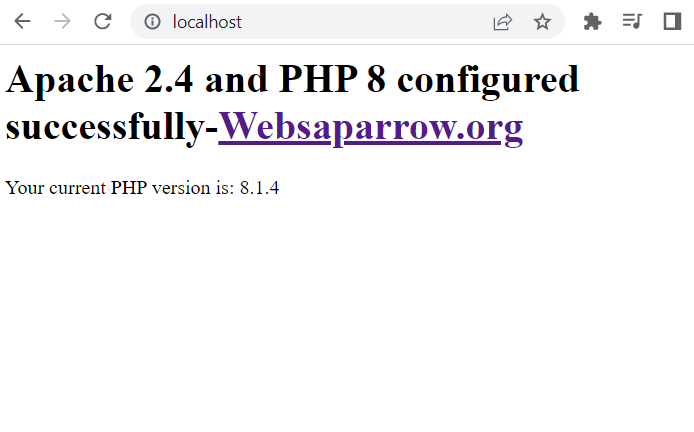
To test the Apache 2.4 and PHP 8 configuration, restart the Apache2.4 service from the Task Manager and rename the index.html file to index.php from the C:\Apache24\htdocs directory and add the below piece of code.
<?php

	echo '<h1>Apache 2.4 and PHP 8 configured successfully-<a href="https://websparrow.org">Websaparrow.org</a></h1>';
	echo ' Your current PHP version is: ' . phpversion();
	header("Refresh:10; url=https://websparrow.org");

 ?>
Open the web browser and hit the localhost in the URL bar, you will get the following details: