How to show and hide File extension in Windows 7?
On this page, we will guide you how you can show and hide the File Extension of any file in your Windows 7 machine.
File extension basically indicates the type of file. By show and hide you can easily detect the behavior of file. It is very helpful in writing the software program in any language also.
Follow the below steps…
Show File Extension
Step 1: Go to Computer » Organize » Folder and search options

Step 2: A new pop-up will open. Click on the View tab.
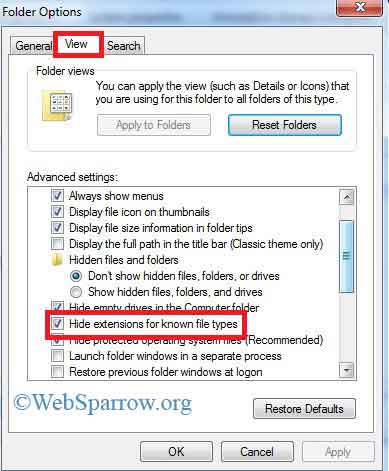
Step 3: Uncheck the highlighted box to show the file extension in the above figure.
Step 4: Check the highlighted box for hiding the file extension in the above figure.
Step 5: Click on Apply » OK
Hide File Extension
To hide the file extension just go to the in Reverse order of the above steps. Check the highlighted box for hiding the file extension in the above figure.