How to call a REST API in React
In modern web development, integrating REST APIs into our React applications is a common requirement. REST APIs enable us to fetch data from a server, send data, and perform various operations. In this tutorial, we will explore how to call a REST API in a React application, step by step, with practical examples.
Prerequisites
To follow along with this tutorial, you should have a basic understanding of React and JavaScript. You will also need a text editor and a working React development environment set up on your machine.
Step 1: Set Up a New React Project
If you already have a React project, you can skip this step. Otherwise, open your terminal and run the following command to create a new React project using Create React App:
npx create-react-app react-rest-api-callStep 2: Create a Component to Make the API Call
Now, let’s create a new component where we will make the API call. Open the generated src folder in your project, create a new components folder, and inside the components folder create a new file called UserComponent.js. In this file, add the following code:
import React, { useEffect, useState } from 'react';
import './UserComponent.css';

const UserComponent = () => {
    const [data, setData] = useState(null);

    useEffect(() => {
        fetchData();
    }, []);

    const fetchData = async () => {
        try {
            const USER_API = 'https://jsonplaceholder.typicode.com/users';
            const response = await fetch(USER_API);
            const jsonData = await response.json();
            setData(jsonData);
        } catch (error) {
            console.log('Error:', error);
        }
    };

    return (
        <div>
            {data ? (
                <table>
                    <tr>
                        <th>Id</th>
                        <th>Name</th>
                        <th>Email</th>
                        <th>Phone</th>
                        <th>Website</th>
                    </tr>
                    {data.map((item) => (

                        <tr key={item.id}>

                            <td>{item.id}</td>
                            <td>{item.name}</td>
                            <td>{item.email}</td>
                            <td>{item.phone}</td>
                            <td>{item.website}</td>

                        </tr>

                    ))}
                </table>
            ) : (
                <p>Loading...</p>
            )}
        </div>
    );
};

export default UserComponent;
Explanation:
- Here, we imported the necessary React hooks:
useEffectanduseState. - Inside the component, we define a state variable
datausing theuseStatehook. Initially, it’s set tonull. - We use the
useEffecthook to call thefetchDatafunction when the component mounts. - In the
fetchDatafunction, we use thefetchfunction to make the API call to the specified endpoint. - If the API call is successful, we parse the response data using
response.json()and update thedatastate with the received JSON data. - In the component’s return statement, we render a loading message if the
dataisnull, and once the data is available, we render a list of items.
Add some CSS styling to the table:
table {
    font-family: arial, sans-serif;
    border-collapse: collapse;
    width: 50%;
}

td,th {
    border: 1px solid #dddddd;
    text-align: left;
    padding: 8px;
}

tr:nth-child(even) {
    background-color: #dddddd;
}
Step 3: Use the User Component in Your App
Open the src/App.js file in your project and modify it as follows:
import React from 'react';
import UserComponent from './components/UserComponent';
const App = () => {
return (
<div>
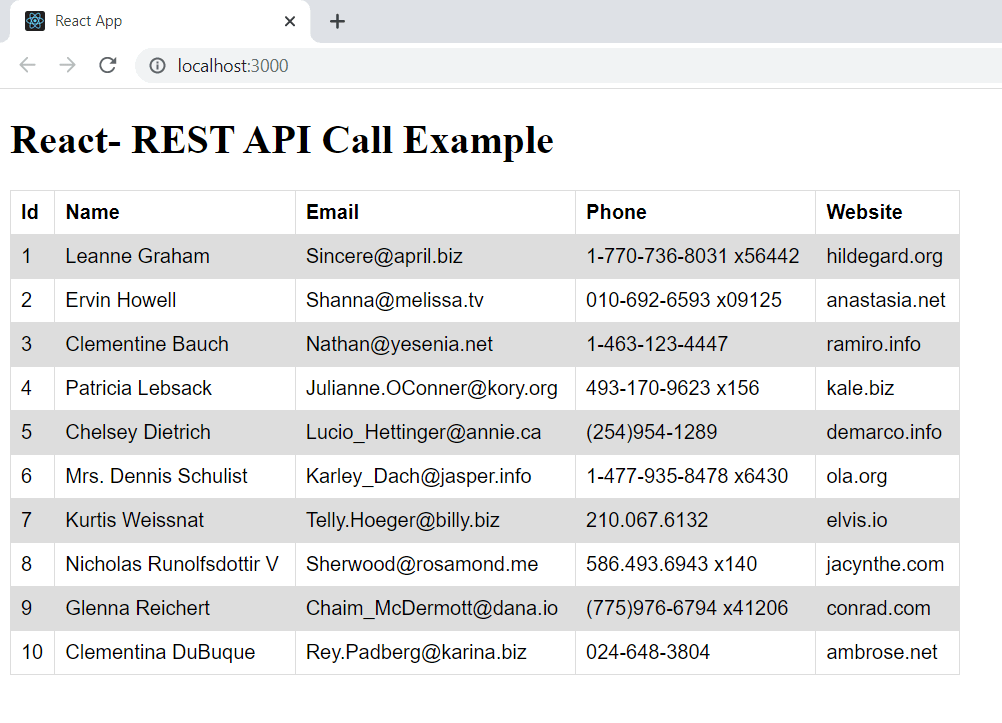
<h1>React- REST API Call Example</h1>
<UserComponent />
</div>
);
};
export default App;Explanation:
- We import the
UserComponentwe created in the previous step. - Inside the
Appcomponent, we render theUserComponentcomponent, which will make the API call and display the data.
Step 4: Start the Development Server
To see the result, go back to your terminal and run the following command inside your project folder:
npm startThis command starts the development server, and you should be able to view your React application in your browser at http://localhost:3000. The page will display the title “React- REST API Call Example” and the data fetched from the API.
Similar Post: How to consume REST APIs in React using Axios