Struts 2 Annotation Login Example
In this Struts 2 tutorial, we will create a login application using Annotation. To create an annotation based application you need to include the struts2-convention-plugin-2.x.x.jar in your project.
Software Used
- NetBeans IDE
- Tomcat 7
- JDK 7
Required Dependencies
You can directly add all core JARs of struts2.x.x in your application or add below to your pom.xml if your application maven based.
<dependencies>
    <dependency>
        <groupId>org.apache.struts</groupId>
        <artifactId>struts2-core</artifactId>
        <version>2.3.16</version>
    </dependency>
    <dependency>
        <groupId>org.apache.struts</groupId>
        <artifactId>struts2-convention-plugin</artifactId>
        <version>2.3.8</version>
    </dependency>
</dependencies>
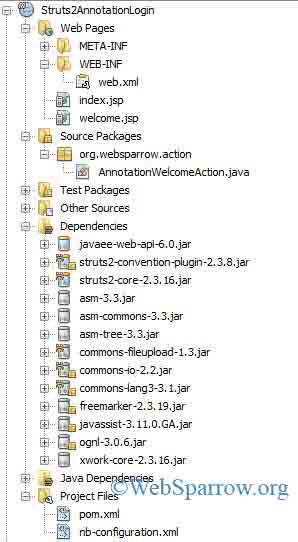
Project Structure in NetBeans

Note: If you are using
Annotation, you need not to create the struts.xml file.
Annotation Snippet
@Namespace: Define the path of action class.
@ResultPath: Define the path of the JSP page.
@Action:: Define the name of the action that is used in the URL.
@Result: Define the JSP page to be displayed.
Define filter in web.xml
Define the struts 2 filters in web.xml and pass the action class by defining actionPackages.
<web-app>
    <welcome-file-list>
        <welcome-file>index.jsp</welcome-file>
    </welcome-file-list>
    <filter>
        <filter-name>struts2</filter-name>
        <filter-class>org.apache.struts2.dispatcher.ng.filter.StrutsPrepareAndExecuteFilter</filter-class>
        <init-param>
            <param-name>actionPackages</param-name>
            <param-value>org.websparrow.action</param-value>
        </init-param>
    </filter>
    <filter-mapping>
        <filter-name>struts2</filter-name>
        <url-pattern>/*</url-pattern>
    </filter-mapping>
</web-app>
Create Annotation based action class
In this class define the name of form variable and generate the getter and setters of variables. And define your business logic.
package org.websparrow.action;

import com.opensymphony.xwork2.ActionSupport;
import org.apache.struts2.convention.annotation.Action;
import org.apache.struts2.convention.annotation.Namespace;
import org.apache.struts2.convention.annotation.Result;
import org.apache.struts2.convention.annotation.ResultPath;

@Namespace("/")
@ResultPath("/")
@Action(value = "register", results = {
    @Result(name = "success", location = "welcome.jsp"),
    @Result(name = "error", location = "index.jsp")})
public class AnnotationWelcomeAction extends ActionSupport {

    private String userId, pass, msg;

    @Override
    public String execute() throws Exception {
        if (pass.equalsIgnoreCase("admin")) {
            return SUCCESS;
        } else {
            msg = "You have entered the wrong password. Try again...";
            return ERROR;
        }
    }

    public String getUserId() {
        return userId;
    }

    public void setUserId(String userId) {
        this.userId = userId;
    }

    public String getPass() {
        return pass;
    }

    public void setPass(String pass) {
        this.pass = pass;
    }

    public String getMsg() {
        return msg;
    }

    public void setMsg(String msg) {
        this.msg = msg;
    }

}
Create JSP pages
Create your form page and welcome page.
<%@taglib prefix="s" uri="/struts-tags" %>
<html>
    <head>
    </head>
    <body>

        <h1>Struts 2 Annotation Login Example</h1>

        <s:form action="register">
            <s:textfield name="userId" label="User Id"></s:textfield>
            <s:password name="pass" label="Password"></s:password>
            <s:submit value="Login"></s:submit>

        </s:form>

        <p style="color: red;"><s:property value="msg"></s:property></p>
    </body>
</html><%@taglib prefix="s" uri="/struts-tags" %>
<html>
<head>
</head>
<body>
<h1>Struts 2 Annotation Login Example</h1>
<p style="color: green;">Welcome, <s:property value="userId"></s:property>. You have successfully logged in.</p>
</body>
</html>Output:
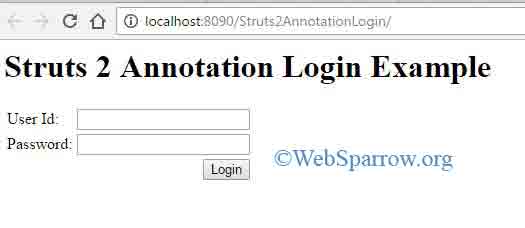
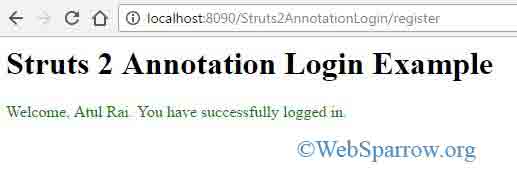
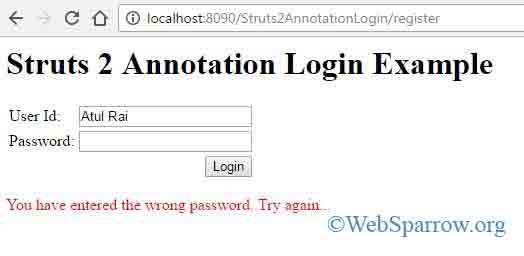
Now run your application and login with credentials. Check the below images for reference.
Screen 1

Screen 2

Screen 3

Download Source Code – struts2-annotation-login-example.zip