Spring Security Role Based Authorization Example
This guide shows you how to configure role-based authorization in Spring Security. To work with Spring Security authorization, we have to override the configure(HttpSecurity http) method of WebSecurityConfigurerAdapter and authorized every request based on the logged-in user role.
What we’ll build
In this example, we will create a Spring Boot application and authorized every request based on the logged-in user role. To do that we need the following:
1. Roles that assigned to the user on which user authorized to access the URL/page:
private static final String ROLE_1 = "ADMIN";
private static final String ROLE_2 = "USER";
2. Users with different roles:
@Override
protected void configure(AuthenticationManagerBuilder auth) throws Exception {
	auth.inMemoryAuthentication()
			.withUser("admin")
			.password(passwordEncoder().encode("admin@123"))
			.roles(ROLE_1)
			.and()
			.withUser("user")
			.password(passwordEncoder().encode("user@123"))
			.roles(ROLE_2);
}
For demonstration, we have used In-Memory authentication.
3. Authorization every request based on the logged-in user role/roles:
@Override
protected void configure(HttpSecurity http) throws Exception {
	http.authorizeRequests()
			.antMatchers("/admin").hasRole(ROLE_1)
			.antMatchers("/user").hasAnyRole(ROLE_2, ROLE_1)
			.antMatchers("/all").permitAll()
			.and().formLogin();
}
4. And some endpoints to accessed by a user based on the assigned role.
Similar Post:
Technology Used
Find the list of all technologies used in this application.
- Spring Tool Suite 4
- JDK 8
- Spring Boot 2.1.7.RELEASE
- Spring Security 5.1.6.RELEASE
- Maven 3
Dependencies Required
To resolve the JAR dependency, add the following code to your pom.xml.
<?xml version="1.0" encoding="UTF-8"?>
<project xmlns="http://maven.apache.org/POM/4.0.0" xmlns:xsi="http://www.w3.org/2001/XMLSchema-instance"
xsi:schemaLocation="http://maven.apache.org/POM/4.0.0 https://maven.apache.org/xsd/maven-4.0.0.xsd">
<modelVersion>4.0.0</modelVersion>
<parent>
<groupId>org.springframework.boot</groupId>
<artifactId>spring-boot-starter-parent</artifactId>
<version>2.1.7.RELEASE</version>
<relativePath /> <!-- lookup parent from repository -->
</parent>
<groupId>org.websparrow</groupId>
<artifactId>spring-security-authorization</artifactId>
<version>0.0.1-SNAPSHOT</version>
<name>spring-security-authorization</name>
<description>Demo project for Spring Secuirty Authorization</description>
<properties>
<java.version>1.8</java.version>
</properties>
<dependencies>
<dependency>
<groupId>org.springframework.boot</groupId>
<artifactId>spring-boot-starter-security</artifactId>
</dependency>
<dependency>
<groupId>org.springframework.boot</groupId>
<artifactId>spring-boot-starter-web</artifactId>
</dependency>
</dependencies>
<build>
<plugins>
<plugin>
<groupId>org.springframework.boot</groupId>
<artifactId>spring-boot-maven-plugin</artifactId>
</plugin>
</plugins>
</build>
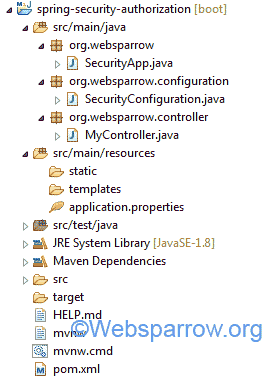
</project>Project Structure
The final project structure of our application in STS 4 IDE will look like as follows:
Now, let’s jump to the actual piece of coding.
1. Endpoints for User
Create some endpoints/pages to be accessed by users based on their roles. In this controller, I have created 3 REST endpoints i.e.
- /admin → accessed by the user has a role of “ADMIN“.
- /user → accessed by the user has the role of “USER/ADMIN“. Of course, ADMIN can access everything.
- /all → accessed by all. No need to log in.
package org.websparrow.controller;

import org.springframework.web.bind.annotation.GetMapping;
import org.springframework.web.bind.annotation.RestController;

@RestController
public class MyController {

	@GetMapping("/admin")
	public String admin() {

		return "<h2>Welcome Admin!</h2>";
	}

	@GetMapping("/user")
	public String user() {

		return "<h2>Welcome User!</h2>";
	}

	@GetMapping("/all")
	public String all() {

		return "<h2>Hello Everyone!</h2>";
	}
}
2. Security Configuration
To limit the access of the user, we need to extend the WebSecurityConfigurerAdapter class and overrides it’s configure(HttpSecurity http) method and authorized every request based on the logged-in user role.
1. /admin → accessed by the user has a role of “ADMIN“.
2. /user → accessed by the user has the role of “USER/ADMIN“. Of course, ADMIN can access everything.
3. /all → accessed by all. No need to log in.
package org.websparrow.configuration;

import org.springframework.context.annotation.Bean;
import org.springframework.context.annotation.Configuration;
import org.springframework.security.config.annotation.authentication.builders.AuthenticationManagerBuilder;
import org.springframework.security.config.annotation.web.builders.HttpSecurity;
import org.springframework.security.config.annotation.web.configuration.EnableWebSecurity;
import org.springframework.security.config.annotation.web.configuration.WebSecurityConfigurerAdapter;
import org.springframework.security.crypto.bcrypt.BCryptPasswordEncoder;
import org.springframework.security.crypto.password.PasswordEncoder;

@Configuration
@EnableWebSecurity
public class SecurityConfiguration extends WebSecurityConfigurerAdapter {

	// Roles for users
	private static final String ROLE_1 = "ADMIN";
	private static final String ROLE_2 = "USER";

	// In-memory users with roles
	@Override
	protected void configure(AuthenticationManagerBuilder auth) throws Exception {
		auth.inMemoryAuthentication()
				.withUser("admin")
				.password(passwordEncoder().encode("admin@123"))
				.roles(ROLE_1)
				.and()
				.withUser("user")
				.password(passwordEncoder().encode("user@123"))
				.roles(ROLE_2);
	}

	// Password encoding
	@Bean
	public PasswordEncoder passwordEncoder() {
		return new BCryptPasswordEncoder();
	}

	// Authorized the request based on role
	@Override
	protected void configure(HttpSecurity http) throws Exception {
		http.authorizeRequests()
				.antMatchers("/admin").hasRole(ROLE_1)
				.antMatchers("/user").hasAnyRole(ROLE_2, ROLE_1)
				.antMatchers("/all").permitAll()
				.and().formLogin();
	}
}
Don’t forget to add
@Configurationand@EnableWebSecurityannotation at the class level of your custom security configuration class.
3. Run the application
The SecurityApp class contains the main method and responsible to start the application.
package org.websparrow;

import org.springframework.boot.SpringApplication;
import org.springframework.boot.autoconfigure.SpringBootApplication;

@SpringBootApplication
public class SecurityApp {

	public static void main(String[] args) {
		SpringApplication.run(SecurityApp.class, args);
	}
}
4. Test the application
To test the application, start the Spring Boot application by executing the above class and follow the below steps:
For /admin page:
- Hit the localhost:8080/admin, it will redirect you to the login page.
- Log in with the user has a role “ADMIN” and after successful authentication, it will show you the admin page.
- Similarly, try to access the admin URL with user don’t have the role of “ADMIN” (user has a role “USER“), Spring Security will block you to access the admin page.
For /user page:
- Hit the localhost:8080/user, it will redirect you to the login page.
- Log in with the user has a role “USER” and after successful authentication, it will show you the user page.
- User has a role “ADMIN” can also access it.
For /all page:
- Spring Security allows localhost:8080/all URL to be accessed by everyone. It doesn’t require to be authenticated.
Download Source Code: spring-security-role-based-authorization-example.zip
References
- Getting Started with Spring Security
- Spring Security- How to change default username and password
- Spring Security – Authorize Requests
Similar Posts
- Does Spring Boot automatically close database connection?
- Generate QR Code using Spring Boot REST API
- Spring Boot- How to change default context path
- Spring Boot Profiles and Configuration Management Example
- How to iterate list on JSP in Spring MVC
- Spring Data MongoRepository Interface Methods Example
- Spring Task Scheduler Example using @Scheduled Annotation
- How to load multiple bean configuration files in Spring
- Spring Data JPA Auditing using AuditorAware
- Failed to start bean ‘documentationPluginsBootstrapper’; nested exception is java.lang.NullPointerException